Screen recording on an iPhone has become an essential feature for capturing app demonstrations, tutorials, and more. This guide explores how to create screen recordings on an iPhone, both with and without audio. Whether you want to showcase app functionalities or share your screen interactions, understanding the process of capturing screen activity is valuable.
This article delves into the step-by-step procedures for your iPhone screen recording with and without sound, empowering users to effectively document and share their on-screen experiences with clarity and convenience.
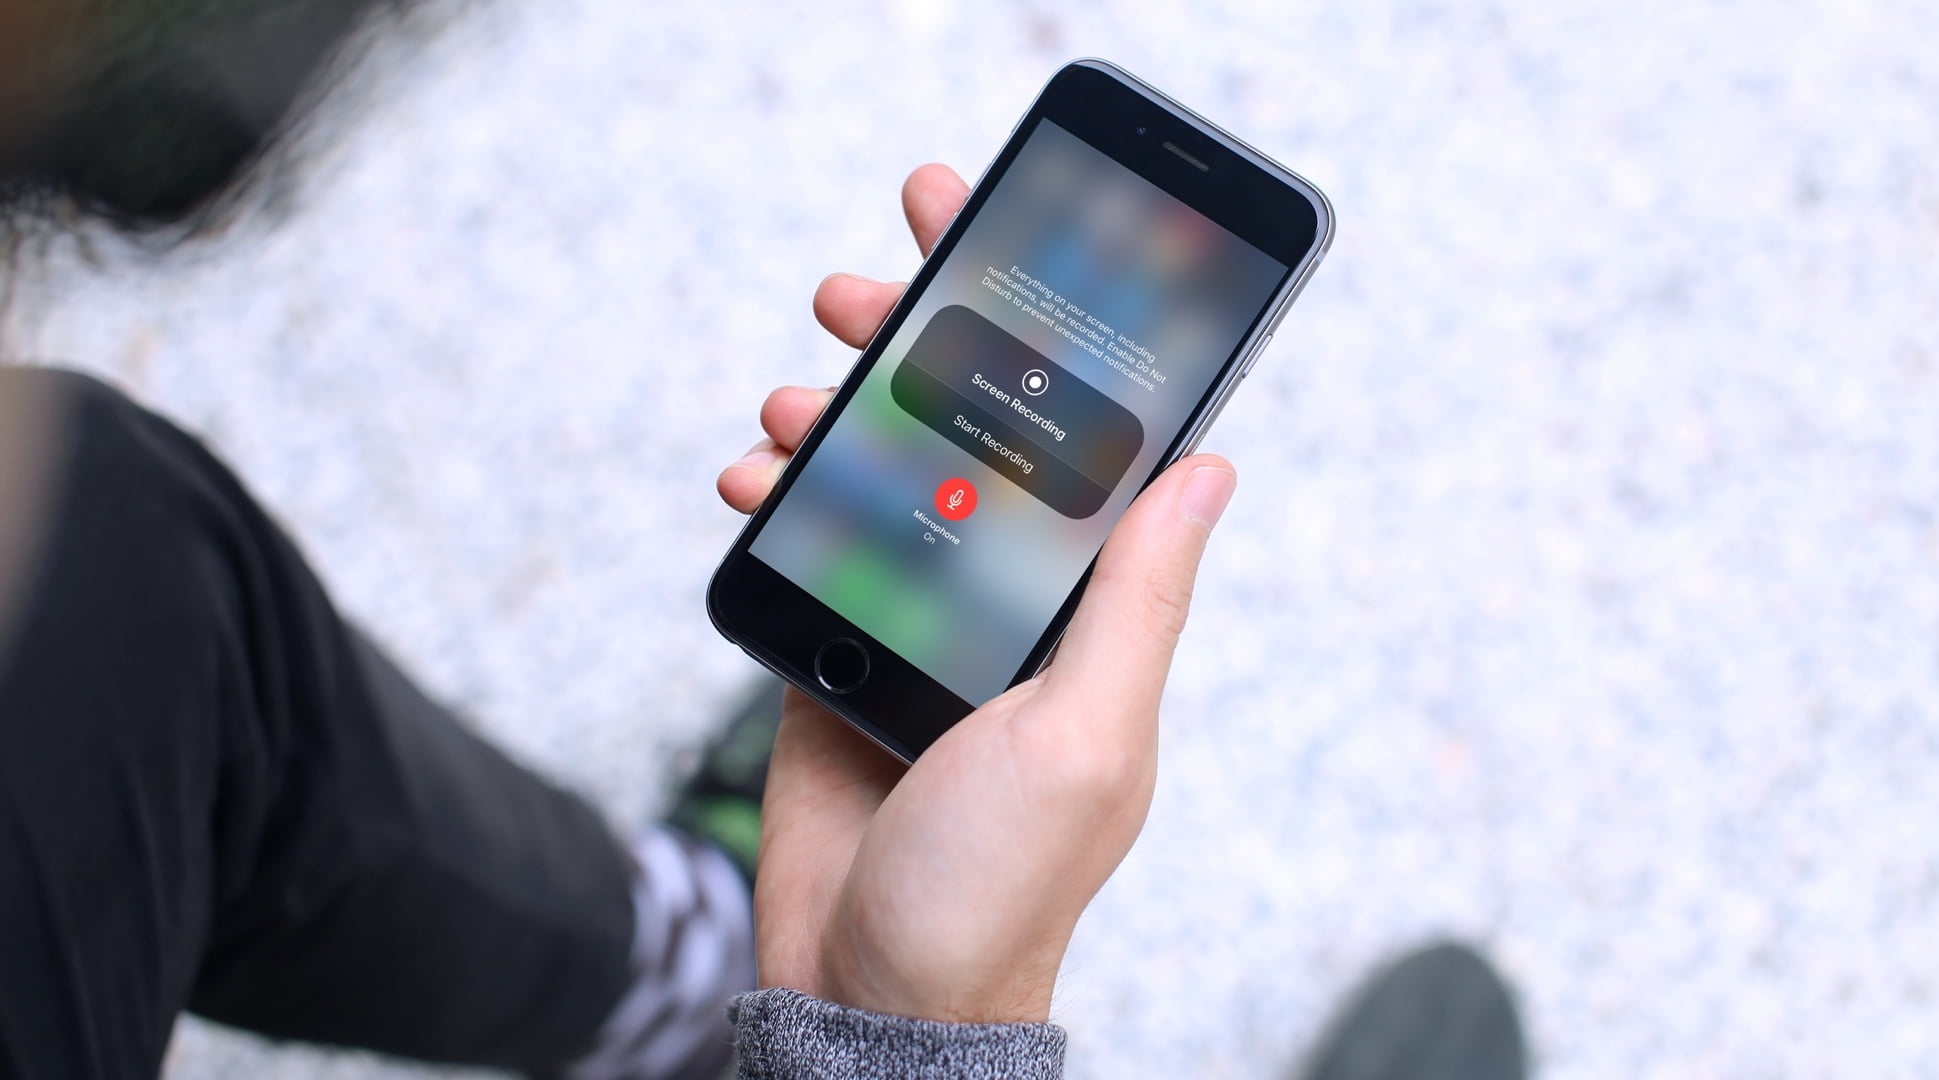
What Is The First Step To iPhone Screen Recording?
The first step to iPhone screen recording is to enable the screen recording feature. Follow these steps:
- Access Control Center: Swipe down from the upper-right corner (iPhone X or newer) or swipe up from the bottom of the screen (iPhone 8 or older) to open the Control Center.
- Add Screen Recording: In the Control Center, tap the “Screen Recording” icon, which looks like a circular button with a dot inside.
- Customize Settings (Optional): If you want to include audio in your recording, press and hold the “Screen Recording” icon until you see a pop-up menu. From there, toggle on “Microphone” to capture sound from your device.
- Start Recording: Tap the “Start Recording” button. A countdown will appear, indicating when the recording will begin.
- Record and Stop: Navigate to the screen you want to record. The status bar will turn red, indicating the recording is in progress. To stop recording, either access the Control Center and tap the red recording indicator, or tap the red status bar and confirm your action.
By following these steps, you can easily activate the screen recording feature on your iPhone and begin capturing your screen activities for various purposes.
How Can You Record With Sound?
To record your iPhone screen with sound, follow these steps:
- Access Control Center: Swipe down from the top-right corner of your iPhone to open the Control Center.
- Enable Microphone Audio: Press and hold the “Screen Recording” icon until a menu appears.
- Activate Microphone: Tap “Microphone Audio” to enable audio recording along with the screen recording.
- Start Recording: Tap the “Start Recording” button. A countdown will appear, indicating the recording is about to begin.
- Record: Your iPhone screen recording with sound has started. The microphone will capture audio from your device and surroundings during the recording.
- Stop Recording: To stop the recording, tap the red recording icon in the status bar or return to the Control Center and tap the “Stop Recording” button.
By enabling microphone audio in the Control Center, you can ensure that your screen recording captures both on-screen visuals and accompanying sound, enhancing the overall quality and effectiveness of your recorded content.
How Do You Start And Atop The Recording?
To start iPhone screen recording, swipe down from the top right corner of your screen (iPhone X or later) or swipe up from the bottom of your screen (iPhone 8 or earlier) to open the Control Center. Look for the Screen Recording icon, which looks like a circle with a dot inside, and tap on it. After a three-second countdown, the recording will begin.
To stop the recording, tap the red status bar at the top of your screen and select Stop. The video will be saved to your Photos app under the “Videos” album. It’s important to note that the maximum recording time for an iPhone screen recording is 30 minutes.
Screen recording can be a useful tool for capturing how-to tutorials, gameplay, or any other content on your iPhone screen. Just remember to start and stop the recording using the Screen Recording icon in your Control Center for a seamless experience.
Where Can You Find The Recording?
Once you’ve completed a screen recording on your iPhone, you can easily locate and manage the recording using the following steps:
- Save Recording: To stop the recording, simply tap the red recording icon in the status bar at the top of the screen, or return to the Control Center and tap the “Stop Recording” button.
- Access Photos App: The recorded video will be automatically saved in the Photos app on your iPhone.
- Find Recording: Open the Photos app and navigate to the “Albums” tab. Look for the Recents album, where your screen recording will be available.
- Edit and Share: Once located, you can tap on the recording to view it. From here, you can edit the video using built-in editing tools or third-party apps. You can also share the recording directly through various platforms like messages, email, or social media.
By following these steps, you can easily find, access, and manage your screen recordings within the Photos app, enabling you to review, edit, and share your captured on-screen activities with others.
Conclusion
Creating iPhone screen recordings offers a versatile way to capture and share on-screen activities. Whether opting for recordings with or without sound, the process involves accessible steps through the Control Center.
Enabling microphone audio enhances the recording by adding accompanying sound. With these methods, users can efficiently document app usage, tutorials, and more, catering to diverse sharing and educational needs.
Whether you choose to include audio or not, the ability to make screen recordings on an iPhone empowers users to convey information, demonstrate processes, and engage audiences effectively.