Our cell phones have become our constant companions in this fast-paced digital age, acting as little personal assistants, memory keepers, and communication tools. These gadgets are not accident-proof, though, and water damage is among the most frequent and damaging incidents. Water can cause major damage to your prized gadget, whether it comes from a splash, a spilled drink, or an unintentional fall into a swimming pool. We will explore the nuances of water damage in this extensive tutorial, and we’ll also provide you with a step-by-step approach for Cell Phone Repair so you can keep it functional.
I. Understanding the Impact of Water Damage
Before diving into the repair process, it’s crucial to comprehend how water can harm your cell phone. When moisture infiltrates the delicate internal components of your device, it can lead to short circuits, corrosion, and irreversible damage. Water damage is notorious for affecting the functionality of crucial elements such as the motherboard, battery, and display. Immediate action is essential to prevent long-term consequences.
II. Emergency Measures: What to Do When Water Strikes
Time is of the essence when dealing with water damage. Here are the immediate steps to take when your cell phone takes an unexpected plunge:
Power Off:
The first instinct might be to check if the phone is still working, but resist the temptation. Power off the device immediately to prevent electrical shorts.
Remove the Battery (if possible):
If your phone has a removable battery, take it out to cut off the power supply. For devices with non-removable batteries, proceed to the next steps without delay.
Dry the Exterior:
Use a clean, dry cloth to gently wipe the exterior of the phone. Avoid using heat sources like a hairdryer, as excessive heat can cause further damage.
III. The Rice Myth and Alternatives
The age-old advice of placing a water-damaged phone in a bag of rice has been circulating for years. While this method can absorb some moisture, it’s not foolproof. A more effective approach is to use moisture-absorbing agents like silica gel packets or specially designed drying kits. Place the phone in a sealed bag with these desiccants to speed up the drying process.
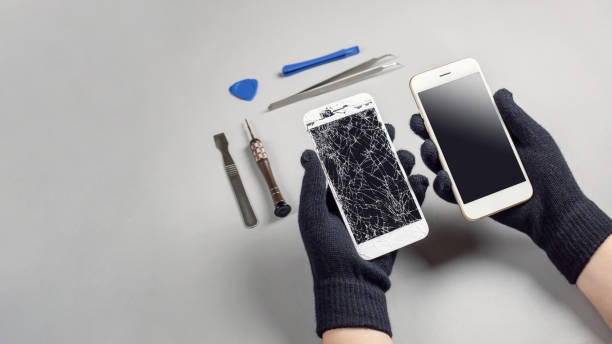
IV. Disassembly: A Precise Approach
To address water damage comprehensively, disassembling the phone is often necessary. However, this step requires precision and should be approached with caution. If you’re not comfortable doing it yourself, seek professional assistance. If you choose to proceed, follow these general steps:
Gather the Right Tools:
You’ll need a set of screwdrivers, plastic prying tools, and an anti-static mat to avoid further damage.
Document the Disassembly:
Take pictures or make notes of the disassembly process. This will be invaluable during reassembly.
Remove Components:
Carefully disconnect and remove the battery, SIM card, and any other removable components. Unplug cables and screws securing the device’s housing.
Inspect for Residue:
Look for any signs of water residue, corrosion, or foreign particles. Clean these areas with a high-purity isopropyl alcohol and a soft brush.
V. Drying and Dehumidifying
After disassembling and cleaning the components, the next step is thorough drying. Here’s how to proceed:
Air-drying:
Place the disassembled parts in a well-ventilated area. Ensure they are not exposed to direct sunlight, as excessive heat can cause damage.
Dehumidifier or Silica Gel:
If available, use a dehumidifier to expedite the drying process. Alternatively, place the components in a sealed container with silica gel packets.
Patience is Key:
Allow the components to dry for at least 24 to 48 hours. Rushing this process may lead to incomplete drying and subsequent issues.
VI. Reassembly and Testing
After ensuring the components are thoroughly dry, it’s time to reassemble your device:
Follow Your Documentation:
Use the pictures or notes you took during disassembly to guide you through the reassembly process.
Power On with Caution:
Before fully reassembling, test the phone to ensure it powers on. If it does, proceed with the final reassembly.
Monitor for issues:
Keep a close eye on the device for any signs of malfunction. Common issues may include a dim display, distorted audio, or erratic behavior.
VII. Professional Assistance
If, after following these steps, your cell phone still exhibits issues, it’s advisable to seek professional assistance. A professional technician can conduct a thorough assessment and perform advanced repairs, including component replacements if necessary.
Conclusion
Understanding water damage and its potential consequences empowers you to take swift and effective action when faced with a wet cell phone. While this guide provides a comprehensive approach to DIY repair, prevention remains the best strategy. Invest in water-resistant phone cases and exercise caution around liquids to safeguard your valuable device from potential disasters. Remember, a proactive approach can save you from the inconvenience and expense of extensive cell phone repairs.